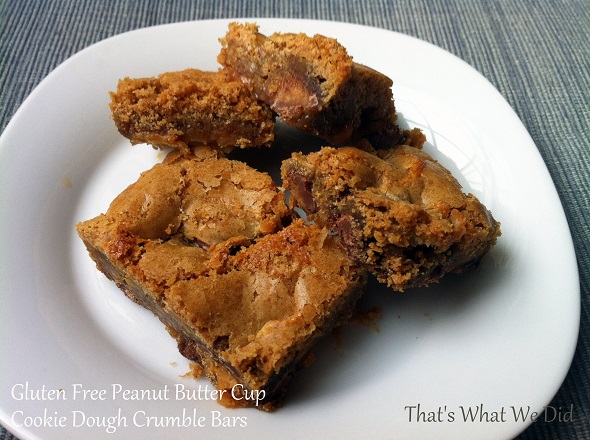
Gluten Free Peanut Butter Cup Cookie Dough Crumble Bars

Two weeks ago I mentioned making Gluten Free Peanut Butter Cup Cookie Dough Crumble Bars based from a recipe from Averie Cooks, and it’s time to share that recipe because you are going to want to make these. You’re also going to want to check out her pictures, because they are SO much better and will make you want to drop everything and get to work in the kitchen. Don’t worry – these bars are simple to make and will be done in no time. Warning – you need to let these set up for about 3 hours in order to cut them easily, so make sure you make them ahead of time!
The best way to describe these are gooey, peanut buttery blondies. I love that you can mix them up in one bowl and that they take sweetened condensed milk. I always end up with extra cans of sweetened condensed milk without a plan to use them up. Now I’ll always have a plan! Unless you try to double this recipe, you’ll only use 1/2 a can. Use the rest of the can on these Seven Minute Microwave Caramels from Averie Cooks. I haven’t made these yet, but they seem simple enough.
Back to the bars… These would be great to use up leftover holiday candy from Easter, Halloween, Christmas, or Valentine’s Day. I didn’t have an 8×8 pan (I thought I did…), so I used a 9×9 Pampered Chef stoneware pan. I recommend an 8×8 pan because the cookie bottom on the bars was a little thinner with the 9×9 pan and I think that allowed more of the sweetened condensed milk to seep to the bottom, which made them sticky on the bottom. I certainly don’t mind sticky, but if you are going to serve these somewhere for people to eat with their fingers, it may not be as pleasant for them. I’ll be buying a new 8×8 pan or doubling the recipe and using a 13×9 pan. Yes, doubling sounds like a great idea – that will leave extra bars to freeze!
What kind of candy are you going to use??
- 1/2 cup butter, melted (1 stick)
- 1 large egg
- 3/4 cup light brown sugar, packed
- 1/4 cup granulated sugar
- 1 tablespoon vanilla extract
- 1 1/2 cups gluten free flour blend (I used Jule’s All-Purpose GF Flour)
- 1/2 teaspoon xanthan gum if your flour blend doesn’t include it (optional, but will make them less crumbly)
- 1/2 teaspoon baking soda
- pinch salt, optional and to taste
- 1 heaping cup diced mini Reese’s Peanut Butter Cups (can also use any other type of diced candy bar such as Snickers, Milky Way, Butterfinger, Heath, Rolos)
- 1/2 cup sweetened condensed milk
- Preheat oven to 350F. Line an 8-by-8-inch baking pan with aluminum foil, spray with cooking spray.
- In a large microwave-safe bowl, melt the stick of butter in the microwave, about 20 seconds at a time. Allow the butter to cool briefly so you don’t scramble the egg.
- Add the egg, sugars, and vanilla, and stir or whisk vigorously to combine, for about 1 minute.
- Add the flour, xanthan gum (if using) baking soda, and optional salt, and stir until just incorporated. Batter will be thick.
- Reserve 1/2 cup batter; set aside. Pour remaining batter out into prepared pan, smoothing it lightly with a spatula.
- Evenly sprinkle the peanut butter cups (or other candy) over the batter.
- Pour sweetened condensed milk over the top (you can eyeball slightly over half of the can as you’re slowly pouring instead of measuring out a 1/2 cup).
- Using your fingers or a spoon sprayed with cooking oil, drop small mounds of the reserved cookie dough over the top.
- Bake for about 30 minutes until edges are firm, raised, and golden, and the middle jiggles just a little bit if you shake the pan. The sweetened condensed milk should nearly be set in all places, and only a little jiggly in the very center of the pan. Bars will firm up more in pan as they cool.
- Allow bars to cool in pan for at least 3 hours before cutting. Lift out using the foil overhang. Cool the bars for 1 hour on the counter, and 2 hours in the refrigerator, or overnight. Or if you can wait, eat some with a spoon now, and chill the rest for later.
- The bottom of the bars can be a little sticky, so we stored ours in the fridge.


Glad you made them and liked them so much! And yes, an 8×8 is much better than the 9×9 for the reasons you mentioned of it being a little thin but clearly, you worked it all out 🙂
I saw that you just made Milky Way ones too…YUM.